


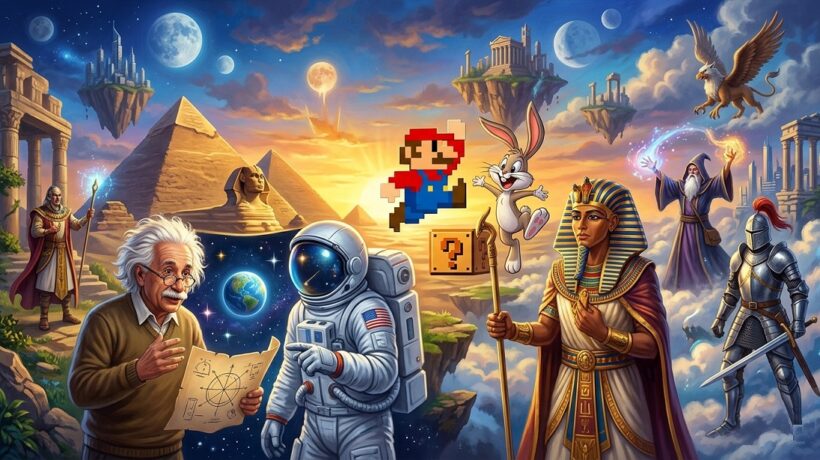
How to Use AI to Generate Graphics and Illustrations for Lessons
Artificial Intelligence for Generating Graphics and Illustrations for Lessons (DALL· E, Canva AI) – Your Personal Creative Assistant
Do you remember that evening before the lesson on ancient Egypt? You had a brilliant idea in your head: instead of showing a photo of the pyramids again, you wanted to move the class inside a workshop where a scribe laboriously puts hieroglyphs on papyrus. You wanted them to feel the dust, see the focus on his face and the light coming in through the small window. An hour spent searching through free internet resources brought frustration. You’ve found either historically inaccurate graphics, or images with a huge watermark, or just… nothing that would reflect your vision. It ended up with a schematic drawing from a textbook and a sense of wasted potential. Your creativity has been locked in a cage of limited resources.
Don’t you sometimes feel like your best ideas for engaging lessons crash into a wall of lack of time and appropriate, unique visuals?
September 20, 2026
In this chapter, I’m going to prove to you that the era of these restrictions has just come to an end. I will show you how, step by step, in just a few minutes, you can become not only a teacher, but also an artistic director of your lessons. You’ll learn how to create breathtaking, perfectly relevant illustrations, diagrams, and graphics using easy-to-use AI tools like DALL· E 3 and Canva AI.
You’ll see that image generation isn’t just another technical chore, but a powerful tool that frees up your time, ignites students’ imaginations, and permanently changes the quality of your work.
Why does it really work? Arguments that will convince you
Before we dive into practice, let’s answer the key question: why is it worth investing these few dozen minutes to master new tools? The answer goes far beyond “pretty pictures”.
- From consumer to creator: you regain control and save time. Until now, you have been doomed to what someone else has created and shared. You spent hours searching through resources, matching the lesson to the graphics you found. Now you are reversing this process. You define the need, and the tool realizes your vision. You turn the time spent on frustrating searches into minutes of creative work. It’s a fundamental change that gives you agency and priceless hours back.
- Visualizing the impossible: the brain loves images. The human brain processes visual information 60,000 times faster than text. With AI, you can make the most of it. What would a walk on Mars look like? How do you illustrate the concept of “infinity” in mathematics? How to visualize an allegory from a literary work? AI can create images of abstract concepts, hypothetical scenarios and processes invisible to the naked eye. Instead of describing – you show. This shortens the path to understanding and makes the knowledge stay in the head for longer.
- The “WOW!” effect and breaking the routine. Students are bombarded with thousands of generic images every day. Their brains have learned to ignore them. When a unique, specially created graphic appears on the presentation (e.g. Nicolaus Copernicus with a telescope in the cyberpunk style), it causes a pattern interruption effect. It immediately focuses attention, arouses curiosity and becomes a starting point for discussion. It’s your secret weapon in the fight against distraction.
- Personalized learning at a new level. Imagine a worksheet with a math problem, on which instead of the anonymous “Johnny”, an illustration of a character from your students’ favorite game appears, who must calculate the route of his spaceship. Imagine end-of-year diplomas where each student receives a unique graphic symbolizing their superpower (e.g., “Master of Helping Others” with an illustration of a superhero). AI allows for such deep personalization of materials that builds relationships and shows students that they are important to you.
The consequences of ignoring this issue?
You risk widening the digital divide between your methods and the world your students live in. In the long run, this means a decrease in engagement and less effective teaching, while other educators will take full advantage of tools that unleash creativity and save time.
Pro-Tip from a practitioner: Use AI to create “visual starters” for lessons. Start the class by displaying mysterious, ambiguous AI-generated graphics (e.g., a clock melting in the desert surrounded by flying books). Ask students three simple questions: What do you see? What do you think? What questions does this raise in you? (See-Think-Wonder technique). It’s a brilliant way to warm up intellectually and get an introduction to the subject.
Workshop: How to do it step by step?
Let’s move from theory to mastery. This 5-step process will turn you into a confident creator.
Step 1: Define the pedagogical goal precisely.
A tool is just a tool. Intention is key. Before you start creating, answer the question: “What role do you want this graphic to play in my lesson?”
Application of Graphics in Education
| Pedagogical objective | Application Example and Inspiration |
|---|---|
| Introduction and curiosity | A scene of Socrates discussing with a robot to initiate a debate about ethics and artificial intelligence. |
| Illustration of a complex process | An aesthetic infographic showing the water cycle in nature, making it easier to understand the successive stages of the circulation of matter. |
| Visualization of an abstract concept | A metaphorical image of “justice” as a tree with perfectly balanced branches and roots. |
| Making materials more attractive | A gallery of historical figures drawn in a modern comic book style, placed on an interactive timeline. |
| Checking your understanding | Find a mistake activity: A graphic of a knight with a mobile phone, requiring the student to know about the era. |
| Inspiration for creative work | Generating a surreal, oneiric landscape as a starting point for writing a fantasy or sci-fi story. |
September 20, 2026
Step 2: Choose the right tool.
You don’t need to know all the generators. To get started, you only need these two, and the choice depends on the context:
| Feature | Microsoft Copilot (DALL· E 3) | Canva (Magic Media) |
|---|---|---|
| Best for… | Create unique, highly creative images from scratch when you have a specific vision. | Quickly add consistent graphics to ready-made projects (presentations, worksheets). |
| Difficulty level | Very low. Just describe the idea in the chat window. | Very low. Integrated with Canva’s intuitive interface. |
| PROS | He has a great understanding of natural language; can generate subtitles on images; It offers the highest quality of details. | Instant integration with the document; access to pre-made styles; It makes it easier to maintain visual consistency. |
| Cons | Requires the use of Copilot’s external website/app. | It has generation limits on the free plan (although they are quite affordable). |
Step 3: Master the art of prompting – the anatomy of the perfect command.
A prompt is your conversation with the AI. The more precise, the better the effect. Instead of saying “paint me a horse”, you have to become a director who describes the whole scene.
Golden Prompt structure:
[1. Styl/Estetyka] + [2. Temat/Obiekt] + [3. Czynność/Kontekst] + [4. Kompozycja/Światło]
- Style and Aesthetics: Determines the appearance of the image.
– Poor: Image
– Strong: Cartoon style illustration for kids, photorealistic portrait, minimalist vector icon, watercolor drawing, infographic style diagram, retro photo, pixel art scene. - Subject/Object: The main character of your artwork. Describe it!
– Poor: Scientist
– Strong: an older, smiling scientist in a white coat and protective glasses - Action and Context: What does the object do and where is it located?
– Poor: Standing in the lab
– Strong: holds a glowing flask with a blue liquid in his hands, stands by a microscope in a modern, brightly lit laboratory - Composition and Light: How is the stage arranged? (For advanced, but gives great effects)
– Poor: (no description)
– Strong: Close-up, aerial view, dramatic side lighting, vivid, saturated colors, on white background
Example of a golden prompt:
Minimalist vector icon (style), depicting a light bulb with a small tree growing inside (object), symbolizing the idea of ecology and innovation (context), on a clean, white background (composition).
Step 4: Iterate and Improve – Your creative conversation with the AI.
The first result is not perfect? That’s great! This is the beginning of the creative process, not a failure.
- “Clarification” technique: Have you generated a character, but there are no glasses? Write in the next command: OK, this is great, but now do the same, just add red glasses to her.
- “Style change” technique: Graphics are too realistic for younger children? Add: Make it in the style of a simple, colorful cartoon.
- The “negative prompt” technique: AI adds unwanted elements, e.g. text? Some tools allow you to add instructions on what to avoid, e.g. … No text, no subtitles.
Step 5: Integrate and discuss – or how to breathe life into graphics.
Downloading an image and pasting it into your presentation is only half the battle. The real magic happens in the classroom:
- Don’t explain right away. Show the graphic and ask the students what they see and how they interpret it.
- Use it as an analysis tool. Ask to find 3 details that relate to the topic of the lesson.
- Create a task around graphics. Add dialogues to the characters in this image. or Describe what happened 5 minutes earlier.
Scenarios from school life: Case Studies and good practices
Case Study 1: Mr. Jacek, historian (class 8)
- Problem: The students could not feel the importance and drama of signing the Constitution of 3 May. Matejko’s image was too chaotic and distant for them.
- Solution: Mr. Jacek used DALL· E 3 to create a series of 3 simple graphics in the style of a modern historical comic: 1) A group of nobles frantically discussing by candlelight; 2) King Stanisław August Poniatowski with pen in hand, determined expression, close-up of a document; 3) Joy and uncertainty on the faces of the townspeople at the news of the constitution.
- Result: Dividing the narrative into comic book frames simplified the message and made it more emotional. The students were able to identify key characters and understand the sequence of events more easily. The lesson turned into a story.
Case Study 2: Ms. Ania, early childhood education (class 2)
- Problem: Fixing the rules of spelling (“ó” and “u”) was boring and abstract for the children.
- Solution: In Canva, Ania created a series of worksheets. For each spelling rule, she generated a cute “guardian monster” using Magic Multimedia. For example, for the “ó” non-fungible, she created a monster named “The Eighth Magnificent”, who had large eyes in the shape of the letter “ó” and appeared next to words such as “mountain”, “king”.
- The result: The children loved the monsters. Spelling has acquired the characteristics of a game and fun. The students themselves began to draw the adventures of “Eighth” and his friends, which further consolidated their knowledge.
Common pitfalls and how to avoid them:
The Perfectionism Trap: You want to create a masterpiece right away.
Tip: Start with the simple things! Generate an icon for the work card, an avatar for yourself. Small victories build confidence.
The AI literalness trap: You ask for a computer mouse on a table, and you get a rodent sitting on a table next to a computer.
Tip: Use synonyms and more precise terms (a device pointing to a computer mouse). Sometimes you need to rephrase a sentence.
Artifact trap: AI still sometimes creates characters with 6 fingers or strangely connected objects.
Tip: Always look at the image carefully. Regenerate it by slightly changing the prompt – this usually solves the problem. Treat it as part of the process, not a mistake.
Teacher’s Essentials: Tools and Resources
Microsoft Copilot (with DALL· E 3): Your personal creativity factory. The best tool to create images from scratch based on the description alone.
Link: https://copilot.microsoft.com/
Pro-Tip: Have a conversation with Copilot. If it generates 4 images, you can write, “I like this third one. Create more variations in this style.”
Canva (Magic Media Feature): Integrated with your favorite combine to create educational materials.
Link: https://www.canva.com/
Pro-Tip: Use the “Styles” option in Canva’s generator. You can choose from the “Watercolor”, “Cinematic”, “Psychedelic” styles, for example, which will allow you to maintain the visual consistency of all the graphics in your design.
Adobe Firefly: A generator from the graphics software giant, trained on Adobe Stock assets, making it one of the most “secure” ethically and legally.
Link: https://firefly.adobe.com/
Pro-Tip: Try the “Generative Fill” feature, which allows you to select a portion of an image and change it with a command (e.g., change the color of your character’s shirt).
Congratulations! You’ve just got a new superpower. AI for image generation is no longer a secret to you, but a practical, everyday ally in creating unforgettable lessons. Remember that every command is a new adventure, and every image generated is a step towards a more engaging and visual education. Start small, experiment without fear, and have fun with the process.
Your Starter Checklist:
- Purpose: What is this graphic supposed to do for my students? (Curious? Explain? Inspire?)
- Tool: Do I start from scratch (Copilot) or do I complete a project in Canva?
- Prompt: Is my command precise? (Style + Object + Action + Context)
- Iteration: Can I improve the score by refining the command?
- Implementation: How will I use this graphic in the classroom to activate students?
FOR IMMEDIATE USE
Practice makes perfect. Choose ONE of the tasks below and complete them today or tomorrow.
- Illustrate the proverb: Go to copilot.microsoft.com and type in a prompt that will literally illustrate the English proverb, e.g. A photorealistic image of a bear sharing its skin while still alive. Show and ask students to guess the proverb.
- Create an item logo: Open Canva, find “Magic Media,” and generate a simple logo for your item. Prompt: Simple, modern logo for biology lessons, leaf icon combined with DNA symbol, vector style.
- Visualize a word from a foreign language: Do you teach English? Generate an image for the word “serendipity”. Prompt: A surreal, dreamy image of a person who accidentally finds a shining pearl in an old book in the library, oil painting style.
- Design a medal: Create a virtual medal for the most active student of the week. Prompt: Gold medal with an engraving of an owl in glasses, with the inscription ‘Master of Knowledge’, drawing style.
- Start with the absurd: To break the first ice, ask the AI for something completely absurd. This is the best way to see the power of this tool. Try: Giraffe in astronaut costume, skateboarding on the moon, National Geographic style photo. See what happens
A new duty – teaching critical thinking in the age of AI
Technical mastery of tools is one thing. But as educators, we are faced with a much more important task: preparing students for life in a world where the line between truth and visual fiction has become dangerously fluid. By introducing AI-generated images into your lessons, you open up the perfect opportunity to talk about disinformation, media, and critical reception of content.
Why is this so important now?
Until a few years ago, creating a photorealistic, fake image required the skills of an expert and expensive software. Today, each student can generate a photo of the Pope in a fashionable jacket or a historical photograph of an event that never took place in 30 seconds. This democratization of the creation of disinformation is one of the greatest challenges of our century. Our role is not to scare students, but to equip them with an intellectual immune system.
How to do it in practice? Mini-lesson scenario:
Topic: True or false? We learn to analyze images.
Time: 20 minutes
Starting Task (5 minutes): Divide the class into small groups. Show them a series of 4-5 images on the board. Among them, place:
- One authentic but unusual historical photo.
- One AI-generated image that looks real (e.g., a 1960 studio photograph, Marie Skłodowska-Curie working on a laptop, black and white).
- One AI image that is fantastic but consistent (e.g., a city built on the back of a giant flying whale, fantasy style).
- One retouched advertising image. Ask the groups to decide which image is “true” and which is not, and prepare ONE argument to support their decision.
Discussion and Conclusions (10 minutes): Discuss the results. You will see how difficult it is to be sure today. During the discussion, enter a set of 5 critical questions that students should ask themselves when viewing any image on the Internet:
- Source: Where does this image come from? Do I trust this website/this author?
- Intention: Why did someone create this painting? Is it supposed to amuse me, convince me of something, or maybe deceive me?
- Details: Does something in the painting look “strange”? (Strange shadows, too many fingers, unnatural background, text that doesn’t make sense).
- Emotions: How does this image evoke in me? Do strong emotions (anger, fear, delight) turn off my critical thinking?
- Context: Is this information confirmed by other, reliable sources?
Summary (5 minutes): Emphasize that the goal is not to be a cynic who doesn’t trust anyone, but a conscious recipient who can ask the right questions.
Secret from the teacher’s room: Students are often unaware of the hidden biases (bias) built into AI models. Models learn from giant datasets from the internet that reflect our social stereotypes. Do an experiment: ask AI to generate images for prompts university professor, nurse, company director. Analyze together what gender and race the characters in the generated images are. It’s a powerful exercise in stereotypes and how technology can replicate them.
Reversal of roles – students as creators. How and why?
So far, we’ve focused on how YOU, the teacher, can use AI to create materials. However, the real revolution begins when you hand over the reins to your students. Instead of asking them to write another essay, ask them to visualize their understanding of the topic.
The pedagogical benefits are enormous:
- From memorization to creation: This is the highest level of Bloom’s taxonomy. A student who can translate abstract knowledge into a concrete image proves that he has really understood the material.
- Different paths of expression: You give a chance to students for whom writing is a barrier. A student with high visual-spatial intelligence can finally show their full potential.
- Learning by doing: Students learn precise thought formulation (by writing prompts), problem-solving (when the AI doesn’t understand), and creativity.
Ideas for cross-curricular projects:
- Polish: Ask your students to create a “cover” for the book that captures its vibe. Or to visualize a metaphor from a poem (generate an image: loneliness as a cracked mirror in an empty room, surreal style).
- Story: “What if?” quest Students generate scenes from alternative history (e.g., Roman legionaries landing in America, a painting in the style of historical painting). Each image must be accompanied by a short justification.
- Biology: Designing organisms. Design and create a realistic illustration of an animal that is perfectly suited to living at the bottom of the Mariana Trench. Describe its features.
- Geography / Foreign Languages: Create travel postcards. Each student draws a country and must create a series of 3 “photos” with characteristic elements of landscape, culture and architecture, and then describe them in a foreign language.
- Education for Values / Ethics: Visualization of Moral Dilemmas. Create an image that symbolically depicts the dilemma between loyalty to a friend and telling the truth. The image becomes the starting point for discussion.
Practical and safety considerations:
Before you start, set clear rules. Introduce the concept of digital citizenship: We don’t generate images that may offend, ridicule, or mislead someone. It’s best to work in groups with one computer connected to the projector – then you have full control over the process and students learn to work together.
For the ambitious – advanced techniques and problem solving
Have you mastered the basics and feel confident? It’s time to raise the bar and learn to speak a language that AI understands even better. Here are some tricks that will give you almost complete control over the end result.
Become a Director: The Magic of Shots and Perspectives
Instead of just describing WHAT is in the image, describe HOW you want it to be shown. Adding video terminology to the prompt works wonders:
- Close-up shot: Focuses on a detail, e.g. the character’s face, hand. (Close-up shot of an old clockmaker’s hands repairing a watch).
- Wide shot or general plan: Shows the entire scene, characters in the environment. Perfect for landscapes.
- View from above/top-down view: You look at the scene straight from above. Great for showing plans, maps, diagrams.
- Low-angle shot: You look at the subject from below. It makes it look powerful and monumental. (Low-angle shot of a giant medieval castle).
Like a Painter: Refining Your Art Style
Instead of writing in a general drawing style, be a connoisseur. The more specific the style you provide, the more interesting the result you will get:
- Specify the technique: linocut print, charcoal drawing, watercolor painting, vector illustration, 3D render.
- Refer to the trend in art: in the style of impressionism, surrealism, cubism, pop art, art nouveau.
- Name a specific artist: in the style of Vincent Van Gogh (you’ll get characteristic brushstrokes), in the style of Tim Burton (gothic, dark atmosphere).
Troubleshooting: When AI Fails – The Most Common Problems and Their Solutions
Problem: “These hands are horrible!” AI has a notorious problem with generating hands with the correct number of fingers.
Solution: Don’t fight it. Modify the prompt to hide the character’s hands (e.g., a character holding their hands in their pockets or behind their back). You can also request a shot where your hands are invisible (portrait from shoulders up).
Problem: “The text in the image is illegible/it’s gibberish.” Although DALL· The E 3 is coping with this better and better, the text is still a problem.
Solution: The best practice is to generate an image without text and then add it yourself in Canva, PowerPoint, or another simple graphical editor. You then have 100% control over the font, size, and content. Prompt: minimalist poster for a science fair, with a large blank space in the middle for text
Problem: “I want the same character in a different pose, and the AI is creating someone completely new!” AI models do not have a “memory” between generations.
Solution: Create a very detailed description of the character and write it down in a notebook, for example. Every time you want to generate a new scene, paste the same, consistent description. For example, the scene involving Zofia, a 12-year-old girl with red hair braided into two braids, in round glasses, dressed in a green sweater. Now Zofia… [tu opisz nową czynność]. This increases the chance of maintaining consistency.